
Lawn & Garden
It’s easy to overlook the importance of soil when planting. Simply digging a hole and planting a flower may not yield the best results if your soil isn’t up to par. In order to create an optimal growing environment, it’s important to amend your soil. The first step is to do a soil test to determine what your soil needs. This article will guide you through the soil testing process and the subsequent steps to improve your soil. The article is divided into helpful sections:
- About Soil
Learn about the basics of soil, including how to conduct a soil test and how to adjust soil nutrients and pH to make it more fertile. This section also covers texture and drainage checks to determine how well your soil absorbs and drains water.
- Preparing Soil
Discover the best ways to amend your soil, including using inorganic and organic fertilizers and composting. You’ll learn about the three main nutrients found in most chemical fertilizers — nitrogen, phosphorous, and potassium — and how to read NPK formulas on fertilizer packaging to choose the best combination for your soil. If you prefer an organic approach, this section also provides tips on making your own compost and other alternatives to chemical soil improvement.
- Soil Techniques
Learn the best methods for preparing your garden bed for planting, including rototilling and hand digging. This section also explains how to install a mowing strip around your garden bed to keep grass from growing where your flowers are. Special techniques such as double-digging for high-performance beds and creating raised beds for poor soil conditions are also covered.
- Mulching
Mulching can benefit any garden by retaining moisture, suppressing weeds, and providing a finished look. This section explains how to properly lay mulch and choose the best type for your needs.
Even if you have nutrient-rich soil, this article can still provide helpful tips and techniques for getting the most out of your garden. Don’t take chances — conduct a soil test and improve your soil for optimal results.
| Sources of Specific Nutrients
There are various fertilizers that can be used to provide specific nutrients to plants, many of which can be easily found in processed and packaged forms.
|
Before planting your garden, there are a few steps you need to take even if your soil is in great condition, especially if you’re planning to grow high-maintenance plants. In the following section, you’ll find some helpful soil techniques, including how to double-dig a garden bed.
About Soil
Good soil is the foundation of a successful garden. However, the loose, dark earth seen in magazines and on television is usually the result of gardeners improving their native soils. Soil can vary greatly, from constantly dry, nutrient-poor sand to rich, heavy clay. Most soil conditions fall somewhere in between these extremes, and few homeowners have the ideal “rich garden loam” to work with.
Sand can be added to soil to loosen and dry it out, while clay can be added to make it more moist and firm. Organic material such as old leaves, twigs, manure, and lawn clippings can be added to improve soil texture and structure. Organic matter nourishes any type of soil, which in turn encourages better plant growth.
To make the most of the soil in your area, start by having your soil tested to identify your garden conditions. Then, follow the tips below to improve your soil and create a great garden.
The Importance of Soil Testing
Before adding fertilizers and amendments to your garden soil, it’s important to determine its composition. Soil testing can help you identify whether you have a light and sandy soil, a moderate and productive soil, or a heavy clay soil. This will help you avoid unnecessary tampering with nutrients or soil acidity, which can create more problems than benefits.
Soil tests can tell you the nutrient levels in your soil, as well as its pH and organic content. These factors are important to ensure a healthy and productive garden. To obtain a good soil sample, dig down 4 to 6 inches in several different locations. You can call your local Cooperative Extension Service to get a soil-testing kit, which contains a soil-collecting bag and instructions. Follow the directions precisely for accurate results.
The results of a soil test may come as a chart full of numbers. If you look carefully, you can begin to interpret these numbers. For example, if the percentage of organic matter is under 5 percent, your garden needs some extra compost. Nutrients will be listed separately, and if an element or two comes in on the low side, you’ll want to add a fertilizer that replaces what’s lacking.
Soil pH is also important to consider. Ratings below 7 are acidic soils, while ratings above 7 are alkaline or basic soil. The most fertile pH range is from 6 to 7. Excessively acidic and alkaline soils can be treated to make them more moderate and productive. It’s best to choose plants that thrive in the pH of your existing soil. If you must alter the pH, follow the guidelines carefully.
Remember, more is not always better when it comes to plant nutrients. Add only the nutrients your soil test says are necessary, and save the rest of your money for a better use, like more plants.
To balance the pH of acidic soils, ground limestone is recommended as it can neutralize the acidity. It is best to add limestone in the fall to allow enough time for it to dissolve and work its magic. The amount of limestone needed depends on the specific soil conditions, which can be determined by a simple home test or a professional test. Using too much limestone can harm the soil, so it is important to follow the guidelines on the package or soil test. On the other hand, to lower the alkalinity and increase the fertility of limey and other soils with a high pH, cottonseed meal, sulfur, pine bark, compost, or pine needles can be used. These soil amendments gradually acidify the soil while improving its texture. Constantly checking and adding amendments to maintain the improved pH is necessary.
To determine the texture of the soil, a simple test can be done at home by filling a jar with soil and water. The soil sample should be taken from near the surface and down to a depth of 8 inches. After adding powdered dishwasher detergent, the jar should be shaken and left undisturbed for a while. The relative percentages of sand, silt, and clay can be determined by measuring the amount of settled particles at different intervals. Soil with a high percentage of sand tends to be well aerated and needs more frequent watering and fertilization. Soil with 35 percent or more clay retains moisture well and needs less watering. Soil with nearly equal percentages of sand, silt, and clay is considered well-suited for gardening.
To test drainage, a simple method could be digging a hole and filling it with water, measuring the time taken for the water to drain out.
To test the drainage of your soil, you can dig a hole and fill it with water. This will help you determine how quickly the water disappears, which is an important factor in determining whether your soil is too dry or too soggy. Rather than relying on soil tests, this simple project can provide you with valuable information about the moisture content of your soil. If you haven’t had rain in a week or more, you can dig several holes that are 1 foot deep and 2 feet wide, fill them with water, and track how long it takes for the holes to empty. Based on this information, you can use the following scale to understand your soil’s drainage: 1 to 12 minutes indicates sharp drainage and potential dryness, 12 to 30 minutes indicates ideal drainage, 30 minutes to 4 hours indicates slow but adequate drainage, and more than 4 hours indicates poor drainage that requires intervention. While these tests may seem like a lot of effort, maintaining optimal soil conditions is important for the health of your plants and their ability to thrive.
| Pay attention to the weeds that grow in your garden, as they can provide important information about the soil. Weeds are opportunistic and will grow in any available space. Dandelions, a plant native to Eurasia, have succeeded in America due to their strategy of taking advantage of vacant soil.
Different types of weeds prefer different types of soil. For example, crabgrass, plantains, sheep sorrel, and horsetails thrive in acidic soil, while chamomile and goosefoot prefer alkaline soil. Redroot pigweed, chickweed, dandelions, and wild mustard grow well in fertile, near-neutral soils. By observing the weeds in your garden, you can determine whether the soil needs work or has a nutrient deficiency. |
After identifying the nature of your soil, you can amend it to suit the needs of your plants. There are various ways to improve soil depending on its characteristics. Here are some tips and techniques.
Preparing Soil
If your soil test identifies any nutrient deficiencies, follow the recommendations provided by the testing company. Organic fertilizers can be used for minor imbalances, but they release nutrients slowly and are inadequate for situations that require fast results or have significant nutrient imbalances. In such cases, inorganic fertilizers are a better option. A combination of both can be used, with the quick-feeding commercial plant foods used first, followed by the slow-feeding organic fertilizers in subsequent years.
Chemical fertilizers are typically formulated with a combination of nitrogen, phosphorous, and potassium, represented by the N, P, and K on the bag. The percentages of these nutrients in the mix are indicated on the bag as well. For example, a 5-10-5 fertilizer contains 5 percent nitrogen, 10 percent phosphorous, and 5 percent potassium.
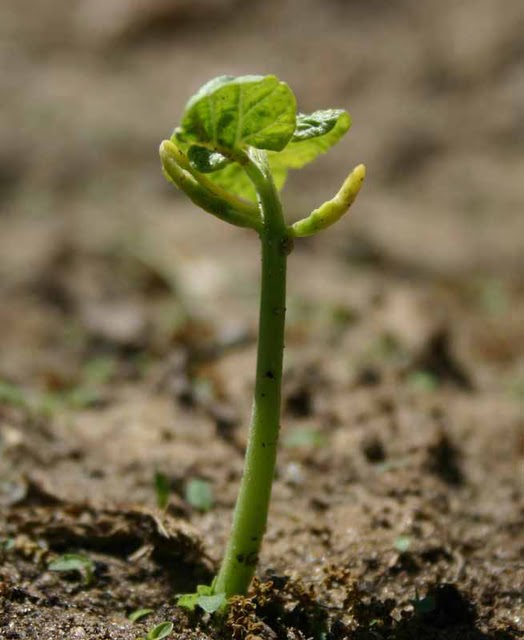 © 2006 Publications International, Ltd. The fruit of your labors — a tiny seedling grows. |
Each container of organic fertilizer displays the NPK formula, with lower percentages of each nutrient compared to inorganic fertilizers, necessitating higher quantities for the same results. In case of a deficiency in a specific nutrient, fertilizers can be purchased separately. Contact the Cooperative Extension office or garden center staff for assistance with nutrient deficiency problems. Apart from fertilizers, there are various other ways to enhance soil quality, such as using organic matter like agricultural remains, compost, livestock manure, and shredded leaves.
your hand. If it crumbles easily, it’s sandy; if it holds together in a ball, it’s clay; and if it crumbles but still holds its shape, it’s loam.
Looking for compost options in your area? Check with your city or town hall service department for local compost made from leaves and grass clippings. You can also reach out to landscapers and nurseries, as well as bulk soil dealers who may sell compost or premium topsoil blended with compost. If you’re struggling to find options, keep in mind that yard scraps are often banned in American landfills, meaning someone nearby may be composting them.
If you plan to add bulky organic soil amendments like compost, manure, or leaves to your garden, keep in mind that the soil level will temporarily rise. As the organic matter decays, the soil will lower, so plan accordingly.
When planting around existing trees, shrubs, or perennial flowers, avoid covering the crown with organic material to prevent disease problems. Additionally, keep the soil level low enough to avoid contact with wooden siding or fencing that isn’t rot-resistant.
To bring your garden soil to life, till or spade a thick layer of compost into lightly moist (never wet) soil before planting. For hard, compacted soil, spade the soil first to break it up, removing weed roots and other unwanted vegetation as you go. After the first pass, use a rototiller and go over the area again crosswise until the soil is broken into small pieces. Adding a 4-6 inch deep layer of compost to the soil and working it down until it’s 10-12 inches deep will help keep the soil loose and light.
Once your soil is loose, light, and rich, try spading or no-till systems to preserve its texture and organic content. Avoid repeated tilling, which breaks down healthy soil clumps and speeds up decay. Instead, loosen rich soil before planting by turning the surface shallowly with a shovel and breaking it apart with a smack from the shovel backside. If the soil is very loose, comb it with a hoe or cultivator to get it ready for direct seeding.
To determine your soil texture quickly, squeeze some lightly moist soil in your hand. If it crumbles easily, it’s sandy; if it holds together in a ball, it’s clay; and if it crumbles but still holds its shape, it’s loam.
Testing Soil Quality
Prior to amending your soil, it’s crucial to assess its quality. To determine the extent of the change, be sure to feel the soil before and after it’s been amended. Take a small quantity of lightly damp soil from a few inches beneath the surface. Squeeze it into a ball in your hand and observe the outcome when you extend your fingers.
Sandy soils can feel rough and crumble easily, but can be improved by adding a layer of compost and a bit of clay. Once enriched, the soil will hold together better. In contrast, clay soils feel smooth and form a tight ball that is difficult to break apart. To make clay soil lighter, add compost and sand until the ball can be easily broken with a tap of a finger.
Techniques for Soil Preparation
Creating a beautiful garden bed for your roses requires special techniques for preparing the soil. Follow these tips to become an expert in no time. To prepare the planting bed, mark the edges with pegs and string or a garden hose, cut through the sod, and remove any rocks.
If you have sandy or loamy soil, you may be able to use a rototiller instead of turning it by hand, but clay and rocky soils require manual digging. For smaller planting areas, use a spade or dig by hand to break up the soil. Once the soil is turned, you can use a rototiller (which can be rented by the day or hired by the hour) to till the soil. Spread fertilizer, soil conditioners, and pH-adjusting chemicals over the area and till the soil again. Ideally, you want the soil to be loosened and improved to a depth of more than 6 inches. For smaller areas, turn and loosen the soil by hand with a spade. Install a mowing strip around the garden bed to keep grass and flowers from mixing, using patio squares, slate pieces, landscape logs, poured concrete strips, or bricks. Allow the soil to stand unplanted for a week or more if possible, and stir the surface 1 or 2 inches every three to four days to prevent fast-germinating weeds. Double-digging is a traditional method used in British gardens for deep-rooted plants such as roses and perennials. It requires a lot of manual labor, but it breaks up compacted soil below the surface. Start by removing a strip of soil a spade’s length deep and wide at one end of the garden, putting it in a wheelbarrow, and turning the soil below it with a shovel. You can also use a garden fork to break up the hard lower soil and add organic matter as needed.
To prepare the second strip of soil next to the first row, repeat the same process. However, mix the topsoil with organic matter and add it to the first trench. Then, loosen and improve the subsurface soil. Keep filling each trench from the adjacent row and loosen the soil below. Finally, fill the last strip with soil from the wheelbarrow. Raised beds can be a good option if the soil quality is poor or non-existent. These beds can be constructed from pressure-treated wood, reinforced concrete, or mortared brick, stone, or blocks. The length can vary, but the soil depth should be at least 6 inches to allow proper root growth. A time-saving tip for digging holes or excavating a garden pool is to pile the dug-out earth on a tarp instead of the grass. This way, any excess soil can be easily removed, and you won’t have to rake up little clods stuck in the turf. Don’t forget to make use of the soil by using it to build a waterfall or filling a raised bed for herbs or vegetables.
One way to provide the ideal soil requirements for a variety of plants is by filling some beds with a rich loam mixture and others with a sandier, well-drained mix. Although it may seem expensive at first, these beds will last for years and prove to be a worthwhile investment. To create raised beds in vegetable gardens, simply mound up planting rows high and wide. Permanent and decorative gardens can be set in raised-bed frames built of timbers, logs, rocks, or bricks, which can vary in height. It’s important to seek professional help for big building projects that require strong structures to last. If using pressure-treated wood, avoid growing herbs or vegetables in raised beds due to the presence of toxins. Adding mulch to your garden is a simple way to improve soil health and enhance the appearance of your landscaping. Mulching can reduce water usage and keep weeds at bay. Dark-colored organic mulches made of bark or compost create a natural-looking garden, while bright gravel can make a garden pop. Utilitarian gardens, like vegetable gardens, can benefit from straw mulch. Fine-textured mulches like twice-shredded bark, compost, or cocoa hulls are effective with a thin layer, while coarse-textured mulches like straw or bark chunks are best for thicker layers. Avoid applying fine-textured mulches like grass clippings in thick layers, as they can mat down and smother the soil.
The article provides tips on how to improve soil quality in gardens. One method involves using newspaper and compost or mulch to kill off unwanted vegetation while adding organic matter to the soil. Woody mulch can also be used, but extra nitrogen should be applied to prevent the decay process from consuming soil nitrogen needed for plant growth. Mulching new plants with straw or leaves can prevent root damage during winter and keep the soil moist. Adding a thick layer of mulch to existing gardens can release minerals and humic acid to improve soil quality. Mulching in winter can protect plants from frost heaving and winter burn. In snowy areas, snow can act as the best mulch of all. By following these tips and working hard, anyone can have a beautiful garden.
FAQ
1. What is soil preparation?
Soil preparation refers to the process of improving the quality of soil in a particular area before planting crops, trees, or flowers. This can be done by adding nutrients, adjusting the pH level, removing weeds, and improving soil structure.
2. Why is soil preparation important?
Soil preparation is important because it ensures that the crops, trees, or flowers planted will have the best possible growing conditions. This can lead to higher yields, healthier plants, and a more beautiful garden or landscape.
3. When should I prepare the soil?
The best time to prepare the soil is in the fall or early spring, before planting. This allows time for amendments to be thoroughly mixed in and for the soil to settle before planting.
4. How do I test my soil?
You can test your soil by using a soil testing kit or by sending a sample to a soil testing lab. These tests will tell you the pH level of the soil, as well as the levels of nutrients like nitrogen, phosphorus, and potassium.
5. What should I add to my soil?
This depends on the results of your soil test. If your soil is lacking in nutrients, you may need to add compost, manure, or fertilizer. If the pH level is too low or too high, you may need to add lime or sulfur.
6. How do I improve soil structure?
Soil structure can be improved by adding organic matter like compost or leaf litter, which helps to improve soil drainage, aeration, and water-holding capacity.
7. How do I remove weeds?
Weeds can be removed by hand, using a hoe or cultivator, or by using an herbicide. It’s important to remove weeds before planting, as they can compete with your crops for nutrients and water.
8. How deep should I till the soil?
Tilling the soil to a depth of 6-8 inches is usually sufficient for most crops. Tilling too deep can disrupt the soil structure and cause compaction.
9. How long should I wait after soil preparation before planting?
This depends on the specific amendments you’ve added and the time of year. In general, it’s a good idea to wait a few weeks after soil preparation before planting to allow the soil to settle and for any added nutrients to become available to the plants.

Brody is a skilled craftsman and gardening expert. From renovating living spaces to cultivating lush gardens, Brody’s knowledge and passion shine through, inspiring readers to embark on their own home improvement and gardening journeys with confidence.


Leave a Reply